Cheesy Bombs
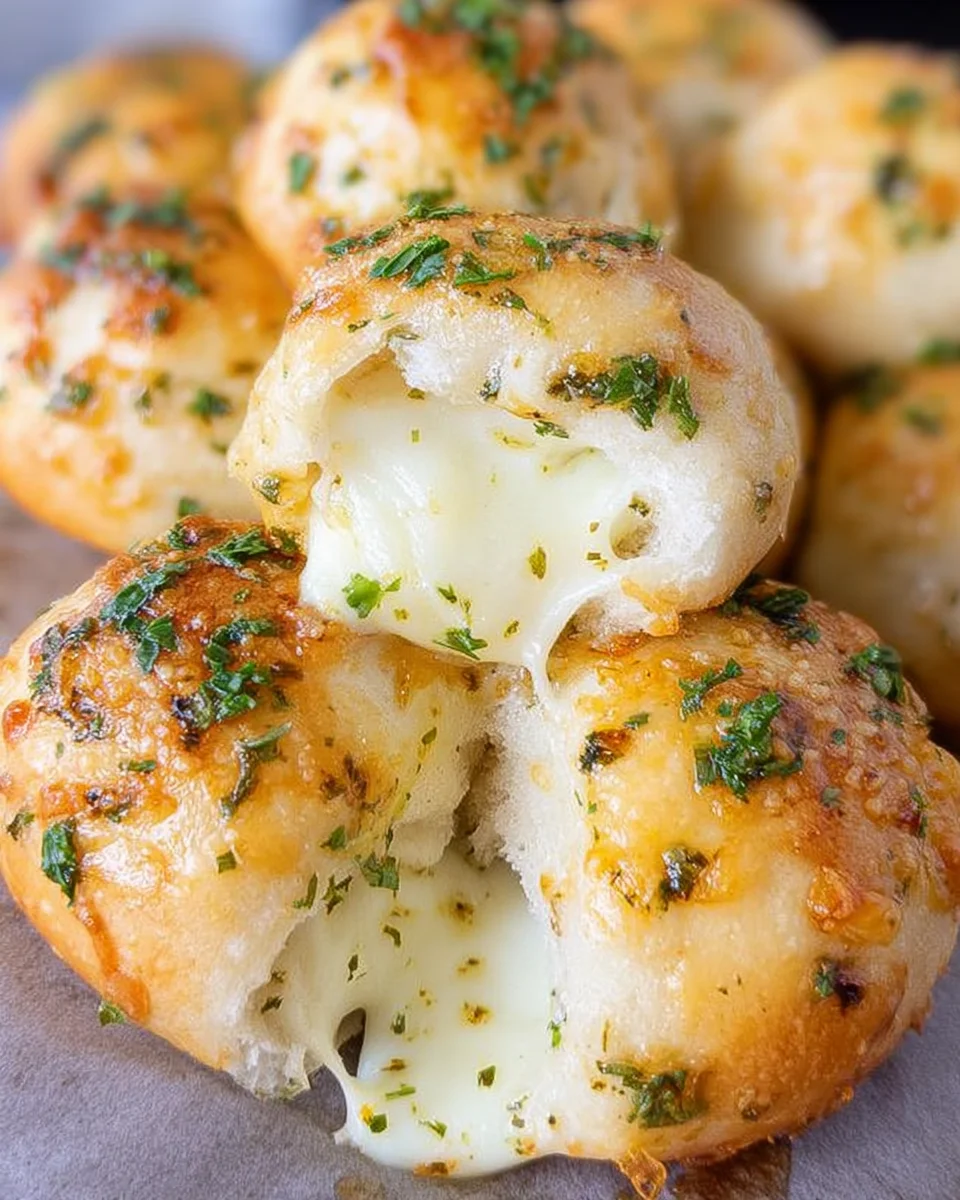
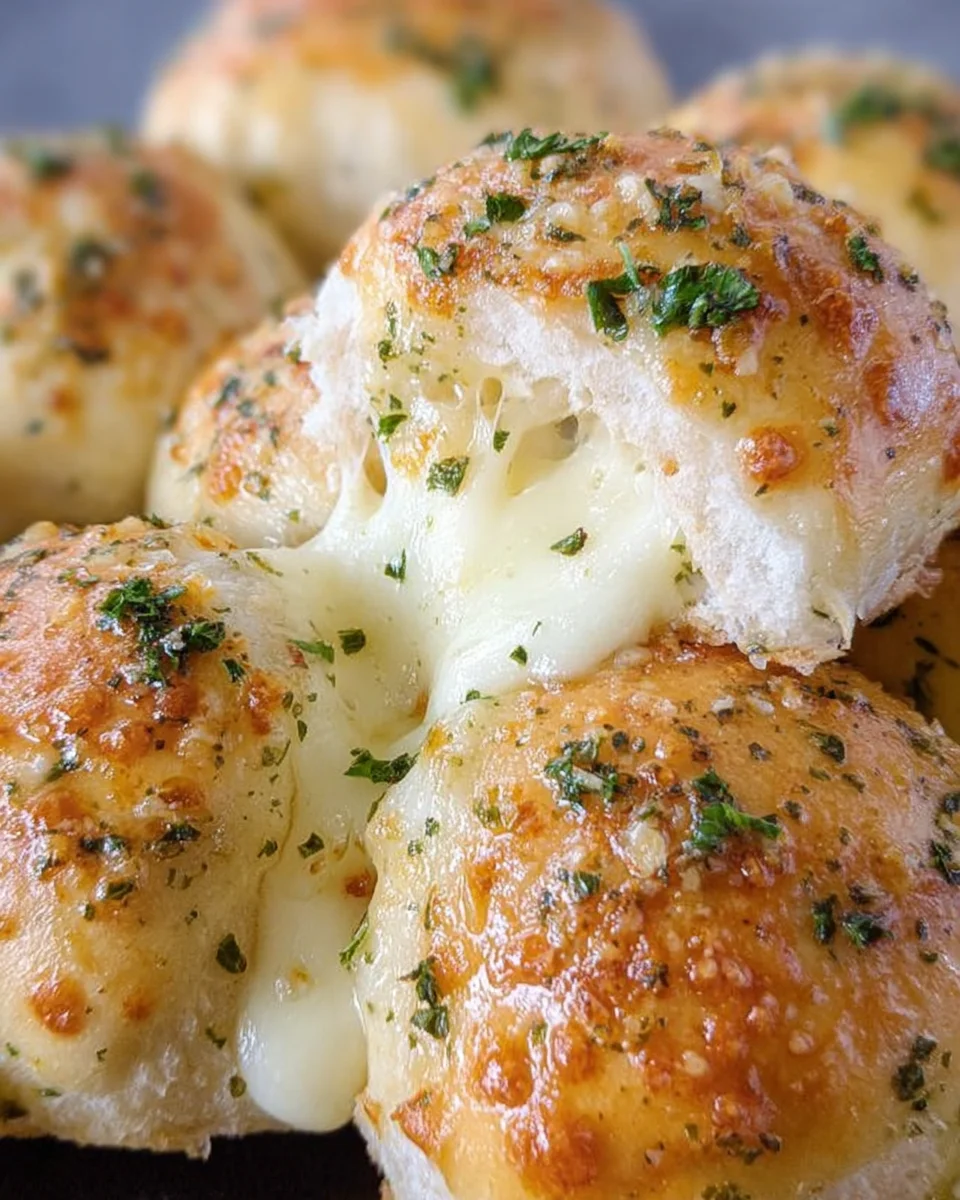
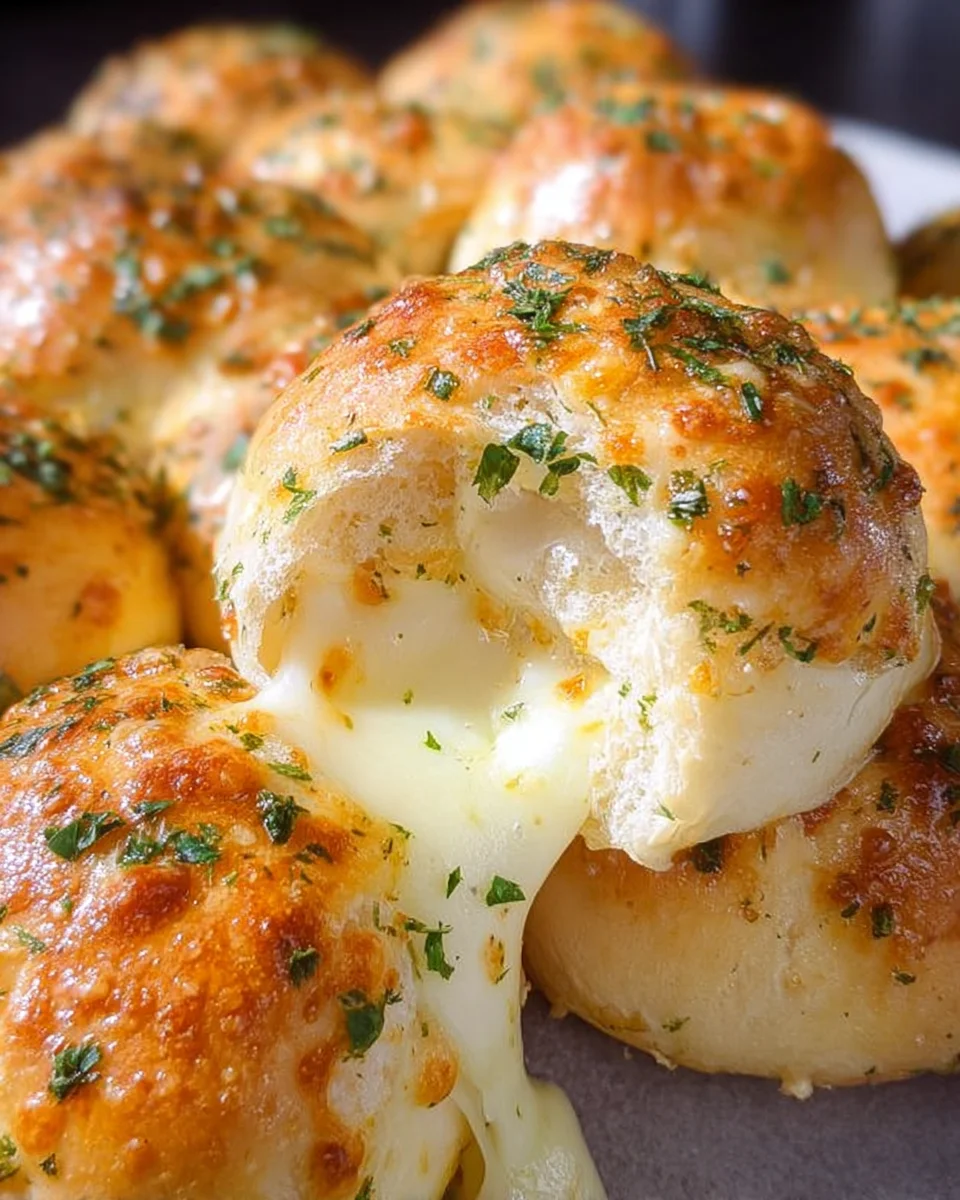
These Cheesy Bombs are an irresistible snack or appetizer that will impress your guests. Stuffed with gooey mozzarella cheese and brushed with flavorful garlic butter, they are perfect for any occasion—from casual gatherings to festive celebrations. The ease of preparation combined with the delightful taste makes these cheesy treats a standout choice in your recipe collection.
Why You’ll Love This Recipe
- Quick and Easy: These Cheesy Bombs come together quickly, making them a great last-minute snack or appetizer.
- Flavor Explosion: The combination of mozzarella cheese and garlic butter creates a deliciously rich flavor that everyone will love.
- Versatile Serving Options: Serve them as an appetizer at parties, a side dish for dinner, or even as a fun breakfast treat.
- Perfectly Gooey Center: Each bite reveals a warm, melty center that is simply irresistible.
- Crowd-Pleaser: Whether you’re hosting a gathering or enjoying a family meal, these cheesy bites are sure to please all ages.
Tools and Preparation
To make these Cheesy Bombs effortlessly, you’ll need some essential tools. Having the right equipment can streamline the cooking process and enhance your experience in the kitchen.
Grab This Chef Knife Now - Almost Gone!
- Stays Razor-Sharp: Ice-hardened blade keeps its edge longer than ordinary knives
- Superior Grip Control: Unique finger hole design gives you perfect balance and safety
- Built to Last a Lifetime: Premium stainless steel blade with elegant beech wood handle
Customer Reviews ★★★★★
Essential Tools and Equipment
- Baking sheet
- Parchment paper
- Microwave-safe dish or saucepan
- Plastic wrap
- Mixing bowl
Importance of Each Tool
- Baking sheet: Provides an even surface for baking your Cheesy Bombs, ensuring they cook uniformly.
- Parchment paper: Prevents sticking and makes cleanup easy after baking.
- Microwave-safe dish: Ideal for melting butter quickly without fuss.
Ingredients
These Cheesy Garlic Bombs are stuffed with mozzarella cheese and brushed with a rich garlic butter. Easy to make and perfect as a snack or appetizer.
For the Dough
- 8 frozen Texas rolls (thawed, Rhodes brand recommended)
For the Cheese Filling
- 4 sticks mozzarella cheese, cut into 16 pieces
For the Garlic Butter
- 4 tablespoons salted butter, melted
- 2 cloves garlic, minced
- 1 tablespoon parsley flakes (freshly chopped or dried)
How to Make Cheesy Bombs
Step 1: Prepare the Rolls
- Place the frozen rolls on a plate.
- Cover them with plastic wrap and refrigerate for at least 4 hours or overnight.
Step 2: Preheat the Oven
- Preheat your oven to 350°F (175°C).
- Line a baking sheet with parchment paper.
Step 3: Cut the Cheese
- Cut the mozzarella sticks into approximately 1-inch pieces.
Step 4: Shape the Dough Balls
- Using your hands, flatten each dough ball into a round disk.
- Place two pieces of cheese in the center of each flattened dough disk.
- Pinch the edges firmly together to seal in the cheese.
- Place the sealed dough balls seam side down on the baking sheet.
Step 5: Bake
- Bake the rolls for 9-11 minutes, or until they start to brown.
Step 6: Prepare Garlic Butter
- While the rolls are baking, melt butter in a microwave-safe dish or saucepan.
- Stir in minced garlic and parsley flakes once melted.
Step 7: Brush with Garlic Butter
- After removing rolls from the oven, brush each one evenly with the garlic butter mixture.
- Allow the cheesy garlic bombs to cool slightly before serving.
Now you have delicious Cheesy Bombs ready to enjoy! Perfectly warm and bursting with flavor, they make every occasion special.
How to Serve Cheesy Bombs
Cheesy Bombs make for a delightful appetizer or snack. They are versatile and can be served in various ways to enhance your dining experience.
For Parties
- Platter Arrangement: Serve the cheesy bombs on a large platter, garnished with fresh parsley for color.
- Dipping Sauces: Offer a selection of sauces like marinara, ranch, or garlic aioli for dipping.
As a Snack
- On-the-Go: Pack them in lunch boxes for an easy snack that kids will love.
- Game Day Treat: Present these cheesy delights during game day gatherings for a crowd-pleasing option.
Breakfast Option
- Pair with Eggs: Serve alongside scrambled eggs and fresh fruits for a hearty breakfast.
- Breakfast Sandwiches: Use them as a filling in breakfast sandwiches with eggs and avocado.
Movie Night
- Finger Food Delight: Enjoy them as finger food while watching movies, paired with popcorn for crunch.
How to Perfect Cheesy Bombs
Perfecting Cheesy Bombs will ensure they turn out delicious every time. Follow these tips for the best results.
- Keep Cheese Cold: Use cold mozzarella to prevent it from melting too quickly during baking.
- Seal Properly: Pinch the edges tightly to keep the cheese from oozing out while baking.
- Use Fresh Garlic: Opt for freshly minced garlic to enhance the flavor of your garlic butter mixture.
- Adjust Baking Time: Keep an eye on the rolls; baking times may vary based on your oven’s temperature accuracy.
- Experiment with Cheese: Try different types of cheese like cheddar or pepper jack for varied flavors.
Best Side Dishes for Cheesy Bombs
Cheesy Bombs can be complemented by several side dishes that add variety and balance to your meal.
- Fresh Garden Salad: A light salad with mixed greens and vinaigrette offers a refreshing contrast.
- Garlic Breadsticks: These provide additional garlic flavor and are perfect for dipping into sauces.
- Roasted Vegetables: A mix of seasonal veggies roasted until tender can add nutritious value to your plate.
- Chips and Salsa: Crunchy tortilla chips served with salsa bring a fun texture contrast.
- Coleslaw: A creamy coleslaw adds crunchiness and complements the cheesy richness of the bombs.
- Stuffed Mushrooms: These savory bites can enhance your appetizer spread beautifully.
Common Mistakes to Avoid
Avoiding mistakes can make your Cheesy Bombs even better. Here are some common pitfalls to steer clear of.
- Using too much flour – Adding excess flour can make the dough dry. Stick to a light dusting when working with the rolls for the best texture.
- Not sealing properly – If you don’t pinch the edges well, cheese will ooze out during baking. Make sure to seal each bomb tightly for a gooey center.
- Skipping the resting time – Rushing the thawing process can result in unevenly baked rolls. Allow enough time for the rolls to thaw completely, preferably overnight.
- Overbaking – Baking too long can lead to tough Cheesy Bombs. Keep an eye on them and remove them once they are golden brown.
- Ignoring garlic butter – This essential step adds flavor. Don’t skip brushing the garlic butter on top; it makes all the difference!
Storage & Reheating Instructions
Refrigerator Storage
- Store leftover Cheesy Bombs in an airtight container.
- They will last for up to 3 days in the refrigerator.
Freezing Cheesy Bombs
- Freeze unbaked Cheesy Bombs before baking for up to 2 months.
- Place them in a single layer on a baking sheet, then transfer them to a freezer-safe bag after they’re frozen.
Reheating Cheesy Bombs
- Oven – Preheat your oven to 350°F and bake for about 5-7 minutes until heated through.
- Microwave – Heat on medium power for 30 seconds at a time until warm. Be cautious not to overheat, as this can make them chewy.
- Stovetop – Warm them in a skillet over low heat, flipping occasionally until warmed through.
Frequently Asked Questions
Here are some common questions about making and enjoying Cheesy Bombs.
Can I use different types of cheese for Cheesy Bombs?
Yes, you can experiment with various cheeses like cheddar or pepper jack for different flavors.
How do I know when my Cheesy Bombs are done?
Look for a golden-brown color on top. They should be puffed up and fragrant.
Can I make Cheesy Bombs ahead of time?
Absolutely! You can prepare them and store them in the fridge or freezer before baking.
What toppings go well with Cheesy Bombs?
Consider adding herbs like oregano or chili flakes on top before baking for extra flavor.
Are these Cheesy Bombs suitable for parties?
Yes! They make perfect appetizers that guests will love at any gathering.
Final Thoughts
These Cheesy Bombs are not only easy to prepare but also incredibly versatile. You can customize them with your favorite cheeses or herbs, making them suitable for any occasion. Whether as a snack or appetizer, they are sure to delight everyone who tries them! Don’t hesitate to give this recipe a try and enjoy their cheesy goodness!
Cheesy Bombs
- Total Time: 26 minutes
- Yield: Approximately 8 servings 1x
Description
Indulge in the cheesy goodness of Cheesy Bombs, an irresistible snack that will elevate any gathering! These delightful bites are stuffed with gooey mozzarella and brushed with a rich garlic butter mix. Perfect for parties, casual get-togethers, or even as a comforting breakfast treat, their warm, melty center is sure to impress. Whether you’re hosting a game day or enjoying a family meal, these cheesy delights are quick and easy to prepare, making them a favorite for all ages.
Ingredients
- 8 frozen Texas rolls (thawed)
- 4 mozzarella cheese sticks (cut into 16 pieces)
- 4 tablespoons salted butter (melted)
- 2 cloves garlic (minced)
- 1 tablespoon parsley flakes
Instructions
- Thaw the frozen rolls in the refrigerator for at least 4 hours or overnight.
- Preheat the oven to 350°F (175°C) and line a baking sheet with parchment paper.
- Cut mozzarella sticks into approximately 1-inch pieces.
- Flatten each dough ball into a disk, place two cheese pieces in the center, and seal tightly.
- Bake for 9-11 minutes until golden brown.
- While baking, melt butter and stir in garlic and parsley flakes.
- Brush baked bombs with garlic butter before serving.
- Prep Time: 15 minutes
- Cook Time: 11 minutes
- Category: Appetizer
- Method: Baking
- Cuisine: American
Nutrition
- Serving Size: 1 serving
- Calories: 100
- Sugar: 0g
- Sodium: 230mg
- Fat: 7g
- Saturated Fat: 4g
- Unsaturated Fat: 3g
- Trans Fat: 0g
- Carbohydrates: 8g
- Fiber: <1g
- Protein: 3g
- Cholesterol: 15mg

